
This is the second installment of my multi-part series on JupiterEd. Last week I covered the basics of JupiterEd, and this week I want to show you how students can submit assignments right in JupiterEd so that you can grade them within the program.
Because of the scope of the information covered, I would consider this to be an intermediate tutorial.This will be easier if you’ve already read my first post of the series and have had time to poke around JupiterEd. If you get lost, just refer back to the basics, and then catch up here.
Juno Docs
Juno Docs are text documents you can write online, directly in JupiterEd. Students can turn them in for essays, journals, and quick write-ups.
Open a JupiterEd dropbox
Each assignment has its own dropbox to which students submit their JunoDoc. (There is no all-purpose dropbox for your class.) To create one:
- Enter the assignment in your gradebook.
- CRITICAL STEP: At the bottom of the Grades > Assignment screen, check “Turn In Online” to let students turn in work for that assignment.
- All file types will be checked. If you only want a Juno Doc submission, uncheck everything except “Accept Juno Docs.”
How students start a Juno Doc and submit assignments
To turn in work, students should go to their Grades, Homework, and Calendar screens. From there they should click on the assignment they wish to submit.


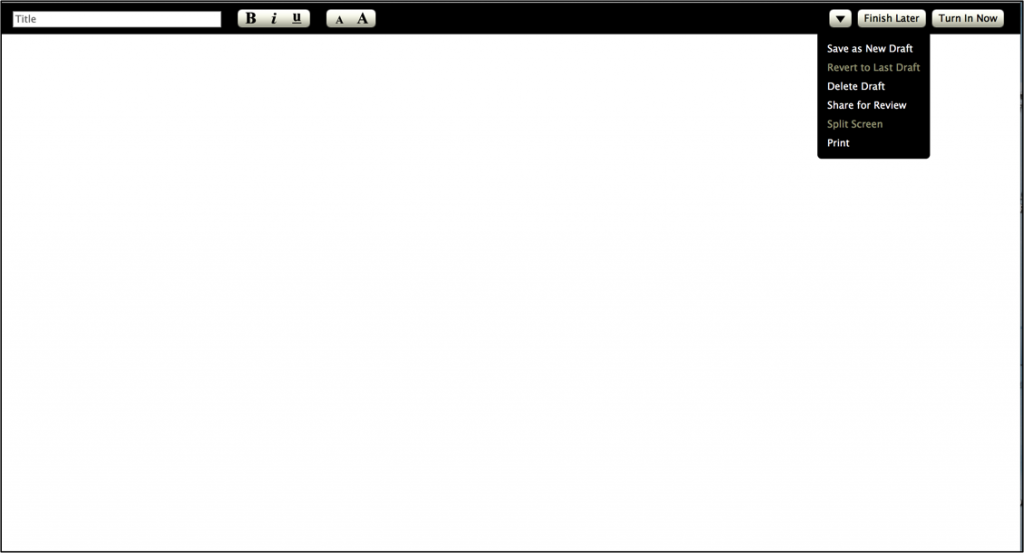
They should select “New Juno Doc”
Students can save multiple drafts — the triangle button gives options to “Save as New Draft”, “Revert to Last Draft”, and “Delete Draft”. When they’re done, they should click on “Turn In Now.”
Grading revisited
Now that students have submitted the assignment as a Juno Doc, it’s time to grade it.
I mentioned in my last post how to grade assignments submitted in JupiterEd. The difference with Juno Docs is that you can annotate comments right into the submission.
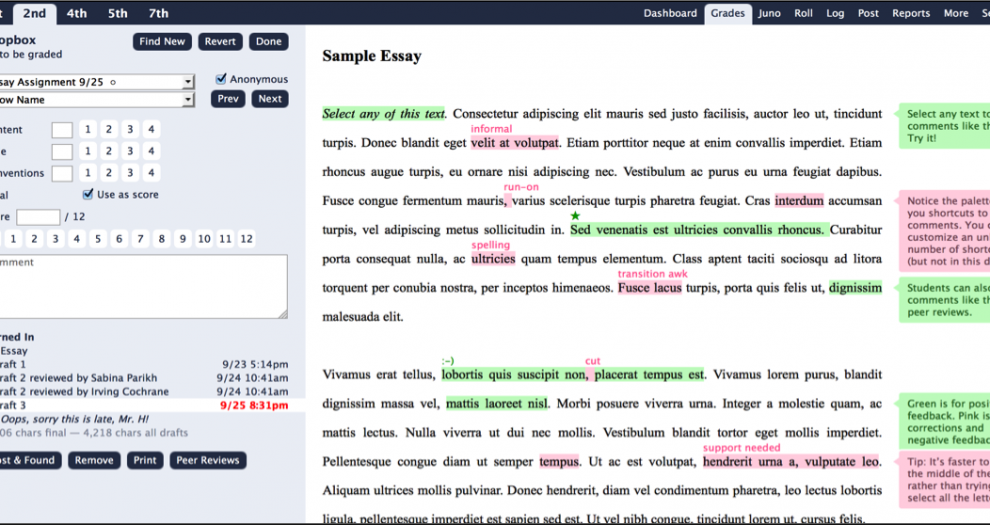
To annotate their work:
- Click on a word to select the whole word. You don’t need to waste time place the cursor before the first character and dragging to the last.
- Double-click text to write a comment.
- Press Return to close the comment box.
To change the option in the Comment box:
As you can see the options in the Comment box have to do with grammar and mechanics. However you can customize it to be more appropriate for your content area.
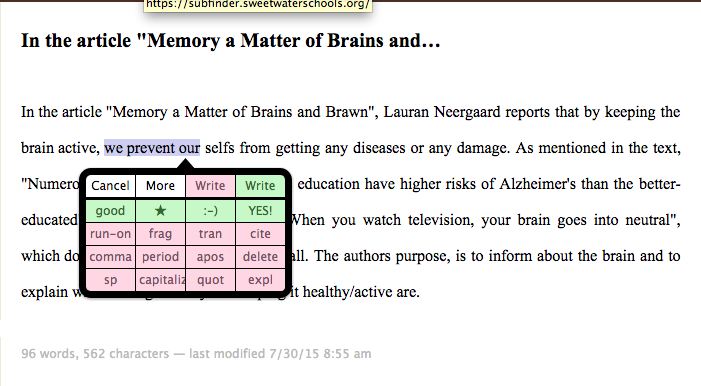
Highlight the part of the text that you want to comment about. Select “More” twice.

After the second time you click on “More,” you’ll be asked t customize the palette.

From here you can change the palette to reflect your needs in your content area.
Grading using a rubric
JupiterEd allows you to easily create rubrics and share them with your site or district.
First, go to Grades>Rubrics
 From here you need to select the assignment that you will append the rubric to.
- You can either create a new rubric, or copy one from another teacher, a previous school year, or one you created for another class.
- To create a new one, you simply add a short label for the “Criterion.” If you choose, you can also describe your requirements for each score.
- If you need to add more criteria, just select “New Row.”
- If you plan to share this rubric with your department or school, select “Share”
- After inputting your rubric, select “Done”
COPYING AND SHARING A RUBRIC
In addition to creating rubrics, you can also share with other teachers to copy.
To copy the same rubric to another assignment, click the “Copy” button and select which assignment to copy from. You can select from any of your gradebooks.
- To share your rubrics with other teachers, click the “Share” button (available only when an assignment is selected). You can select which schools to share with if your district account has more than one.
- To copy from another teacher, click the “Copy” button and select which teacher, or select “Everyone”. This lists all rubrics that were shared at your school.
- When copying rubrics, you have the option to “Append” the rubric to what you already have, so you can merge them together and delete anything you don’t need.
Note: Sharing makes a copy of the rubric, so any edits anyone makes does not affect other teachers or other assignments.
Other information about Juno Docs
- Juno Docs allows bold, italic, and underline, but no other formatting. You cannot change fonts, text size, alignment, spacing, etc. This helps students stay focused on just the writing, but it is not suitable where a page layout is a learning objective.
- Students cannot insert images directly into Juno Docs, but they may turn in images as separate files.
- Students may turn in multple drafts in Juno Docs. I usually just grade the most recent one.
- Once students turn in a Juno Doc, they cannot change it (but they can turn in new drafts).
- Students may share their Juno Docs with others for peer reviews. This does not allow co-authoring.
- Juno Docs auto-saves, so it’s safe to compose online.
- If a student types their Juno Doc in another program, it will not necessarily look exactly the same as a Juno Doc.
I hope this gives you plenty to work with this week; please leave a comment if you have any questions!
![]()
